Eclipse!!!
Happy Eclipse Day!!! Tonight is the night. I have a date with a gorgeous, sparkly vampire at 12:01! For the occasion, I have painted some t-shirts for myself and a few friends. One of my besties and I are all about Edward, while my mom and a couple more of my awesome friends love all things Jacob. I did these shirts using the freezer paper method, which is terrific! There are many videos on youtube showing this method. For the front, I used a moon from the Don Juan cartridge. It is painted a light yellow with gold glitter, although in the pics, they look all white. The stars are from Pooh and Friends and the lettering is from Cake Basics. To make these stencils, I put the freezer paper on my Cricut Mat shiny side up. (It doesn’t stick as well to the mat.) The key here is to remember to flip the object because the paper will be shiny side down on the shirt. For the Cricut, the settings I used were Med pressure, Med speed(for things I didn’t use the gypsy on, like the lettering.) and a blade depth of 4. This paper cut beautifully! When done cutting, place the stencil on a prewashed t-shirt. Iron the stencil into place. The heat from the iron will make the shiny side of the paper tacky, so it sticks into place. I then just used a foam brush to paint on the Tulip Fabric Paint. I waited a few minutes before pulling the stencils off, just so I didn’t smear it and make a big mess, but I didn’t wait until it was completely dry. Hope you like the shirts. As for me, my vampire awaits!
Birthday Princess Cards
These adorable birthday cards are for the same twins I made the name plaques for. I used Once Upon a Princess for the castle, which is cut at 4″. It is 4 layers. The writing is done with a Marvy Embossing marker and heat embossed with Gold Embossing powder. The inside is also handwritten and heat embossed. The scalloped circle is a Nestabilities die. I used the same marker to write 1st in the circle so it would stand out. I LOVE the Once upon a Princess cartridge!
Name Plaques
One of my good friends has a set of beautiful identical twin girls who will be celebrating their 1st birthday this weekend. I picked up a couple of 4×16″ pine boards at Hobby Lobby along with some vinyl to make these plaques. The font is from the Storybook Cartridge, and the butterflies are from Cake Basics cartridge. There are some great cuts on those cake carts! The names are cut at 2.5″ if I can remember correctly. I laid it out on my gypsy, so I can’t remember exactly without pulling it back out. I’m pretty sure the butterflies are at 1.5″ height. You can’t see it very well on this pic, but the base of the butterfly is pink. I am very pleased with how well these came out. Hope you enjoy!
Topiaries in large quanities!
Hi. I have been very busy the past several weeks putting all these arrangements together for a retirement party. I had to do 20 of the Topiary arrangements which can be seen in a previous post, as well as 20 of the Tim Holtz rose arrangements, also previously posted. This was my first large event, and my mom and I were high fiving at 11:00 pm the night before the party as we finished up and got the last ones packed. I didn’t to get pics of them sitting at at the party as I was on stage during the presentation. I also couldn’t get them at home as I don’t have the space to sit out that many at one time. While we were finishing them up, I had them spread out over two rooms. But here they are all packed up and ready to go. At least you can see the massive amount of flowers that I put together!
Topiary
This is an idea I got from a fellow member of the cricut.com message board. The flowers are cut from the Sweethearts cart at 3″, 2.5″, 2″ and 1.5″. I then layered them together and used a corsage pin to hold it onto the Styrofoam sphere. Thanks to Vickie Bryan for the directions!!! The small pail I got at Hobby Lobby, and there is a Styrofoam disk in the bottom to hold the dowel. Hope you like it!
Tim Holtz Roses
Hi, everybody. It has been a while since I’ve posted, but I have a couple new projects to share. I have been asked to decorate for a retirement party coming up next month, and I wanted to share the pieces I will be showing as examples. The first is the Tim Holtz Roses. In the original version, he uses a sizzix die, but thanks to the wonderful Kathy Orta, these were made using the cricut. I believe I used the flower on Forever Young for these, but any 5 or 6 petal flower will work. He also uses grungepaper, but since I may need lots of these, and grungepaper is quite expensive, I used regular cardstock. Each rose takes 3 flower cut outs. These are cut at 2.5 inches, and I think I cut them on shadow. The outer petals just have a simple “X” cut into the center. The second has one petal cut out and folded together. The third flower cut has two petals removed and glued together like the first one. I then glued the layers together. Last, take the two petals that were cut out and fold or roll to form a cone shape. This is what makes the bud in the middle. I used hot glue in this project. Since it does not involve photos, it does not have to be acid free. The basket is from the Mother’s Day Mini cart. This isn’t very difficult to make, but it is difficult to explain in words. For an excellent tutorial, check out Kathy Orta on You Tube, or her blog at www.paperphenomenon. blogspot.com. She has a wonderful video showing how to make these flowers as well as lots of other great projects. 


Birthday Card
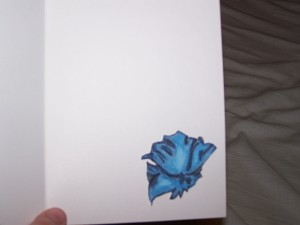
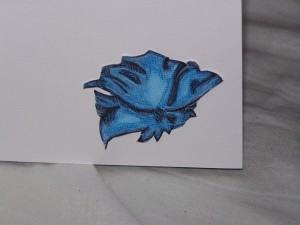
This is a birthday card I made for a great friend of mine. It is a 5×7 card. The top is embossed with the Happy Birthday Cuttlebug folder and the blue one at the bottom is embossed with Swiss Dots. I used the ribbon over the place the two were put together. I matted it on a sheet from the DCWV Mariposa mat stack. Very pretty papers! The flower on the inside is a Close to my Heart stamp that I colored with Prismacolor pencils. Let me know what you think! 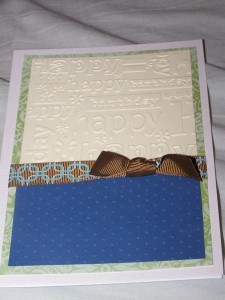
Valentine’s Day Sour Cream Containers
These are some very easy sour cream containers that I made for my mom to give to her co-workers. I used 8×8 sheets of paper that I cut in half. I did cut about a 2 inch strip off the bottom that I ended up using for a different project. I ran the sheets through the Cuttlebug for some texture. Use double sided tape (I used a Glue Glider Pro) on both long sides and one short side. Roll it up so it looks like a toilet paper roll and seal one of the ends. Fill it up with goodies and seal the other end in the opposite direction than the first. This size container holds 8 Hershey Kisses. I then used my paper crimper on both ends to help seal the tape and give it a more finished look, but this isn’t necessary. I just like the way it looks. The tag is a Marvy punch. It is stamped with my “Handmade for you by…” personalized stamp and inked with a little Tim Holtz Walnut Stain distress ink, just on the edges. I added a couple strands of curling ribbon and held it in place with a gold colored mini brad. These are super simple and can be made quickly. These would make great party favors as well. Where was this idea when I was helping my sister with her wedding??? LOL. I know you’ll see this, Leslie, and yes, I really wish I had seen these before! 
Valentines Day Projects
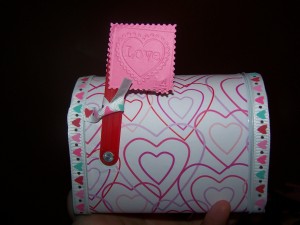
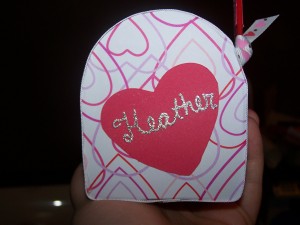
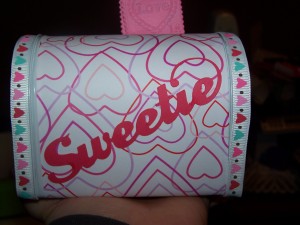
I have also done a couple of those super cute Target mailboxes. For those who may not be familiar with them, they are small metal mailboxes that come for the $1 bargain bins at Target. Once altered, these make adorable gifts. I only have pics of one of them so far, but still have a couple more to make. (And the pics of the first one just didn’t come out right. Will have to try that again later.) To do this mailbox, I used a 12X12 sheet of printed paper (also from the target bargain bin) that I cut into a 4″ wide strip. The 4×12 fits this mailbox perfectly. To get around the flag, I used a 1/4″ round punch and made a slit with the scissors to get it around the flag. For the pink pieces on the flag, I used the Cuttlebug die to get the stamp shape, then ran it through again with the “Love” embossing folder. The word “Sweetie” on the side is cut from the Love Struck mini cartridge at, I think, 2 inches. I also got the heart on the front from Love Struck, but it was originally supposed to have been a heart with a banner across it. This was the shadow function of the cut. The regular cut kept giving me a hard time getting it off the mat, so I gave up and just cut the banner ends off the shadow cut and used it as a regular heart. The name was written on with Marvy Wet Embossing markers and heat embossed with silver embossing powder. These are small, but I managed to get more stuff in there than I expected. Inside it has 2 of the travel size bottles from Bath and Body Works, a small box of Sweetheart candies, and a small lip gloss from Michael’s. Hope you like it!